What is Salesforce Path?
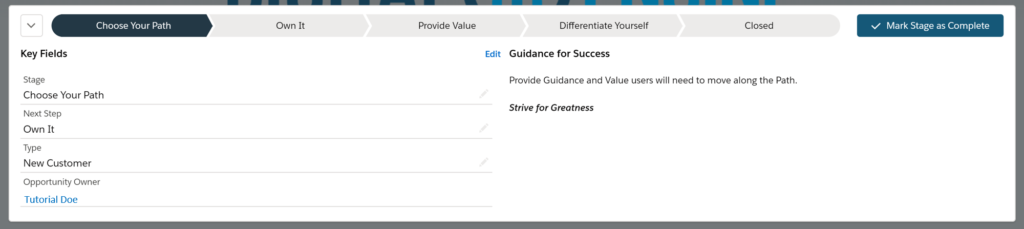
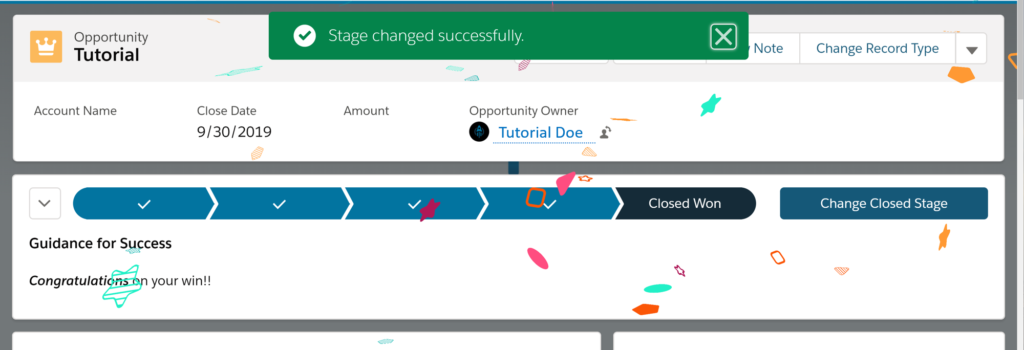
Salesforce Path is a visualization tool, used on objects, to help guide users along a Path to a final destination. Path is only available in Salesforce Lightning. It provides 5 key fields and a Guidance for Success for each section under the Path stages to provide the guidance users will use to succeed. Tips, links, and best practices are examples of what can be provided in the Path set-up (Salesforce is looking to add more key fields in the future).
- Accounts
- Campaigns
- Cases
- Contacts
- Contracts
- Leads
- Opportunities
- Orders
- Quotes
- Service Appointments
- Work Orders
- Work Order Line Items
- Custom Objects
How to Setup a Path in Salesforce
Step 1: Create a New Record Type
Create a New Record Type on the object you would like to create the Path on and setup its own sales process for the new Record Type. This is important as the Path uses Picklists from the object as the points along the Path. If you have multiple opportunity use cases, for example, this can create issues if the Path does not have its own Record Type and Process.
Step 2: Enable the Path
Navigate to Setup, then type "Path" in the Quick Find Box. This will show Path Settings. After selecting the Path Setting, select Enable. Then choose whether the path remembers its previous state by selecting Remember User’s Path Preferences. If this is not selected, the path’s details are hidden when the page loads. Then select New Path.

Step 3: Create the Path
Here you will provide the information needed to create the Path. Give it a unique name, choose the Object that the Path will be used on, select the Record Type you created, then choose which Picklist from the Record Type that will be used for the Path. Select Next on the bottom right to proceed.

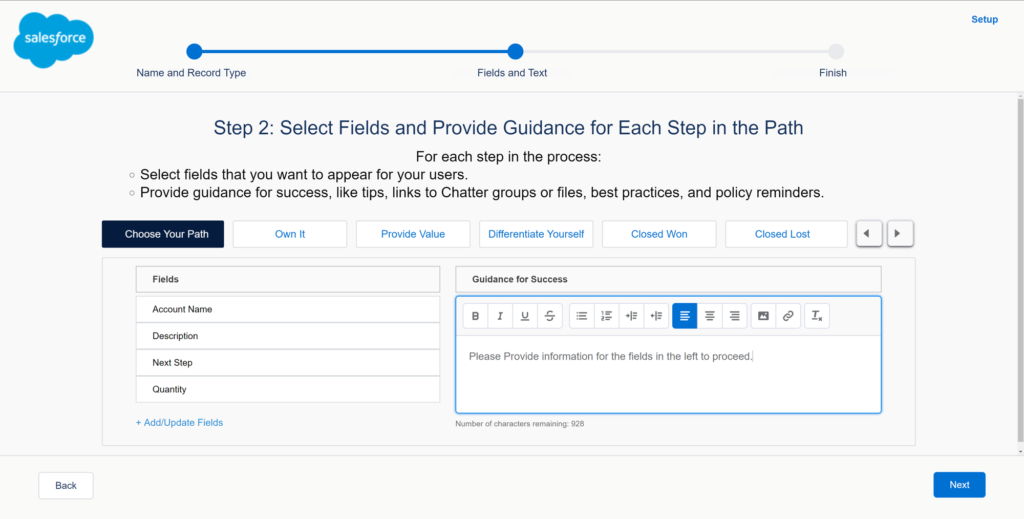
Step 4: Select Key Fields
This is where you will select the key fields, up to five at this time, for each stage and provide any guidance, 1,000 character limit, to help users along the path.
The Guidance for Success Section can link to Files that are shareable in Salesforce, this may be useful if a document needs to be shared with the prospect/client at this stage.
After completing what information needs to be provided at each stage select next in the bottom right to continue.
Step 5: Activate the Path
At this stage you can choose whether or not to add a fun confetti animation at a completed stage and whether to activate your Path.

Step 6: Create Additional Salesforce Paths (optional)
From here you can create as many Path’s on objects that you feel can add value to the users following them.